Contact Us
Changsha Hone Arts Co.,Ltd
TEL: +86-731-84886102
WhatApp:13975166561
E-mail: marketing5@hnarts.com
Address :RM 8033 FL 8 Tower B Wan Fu Hui Mansion 9 Shuang Yong RD PC 410003 Changsha China


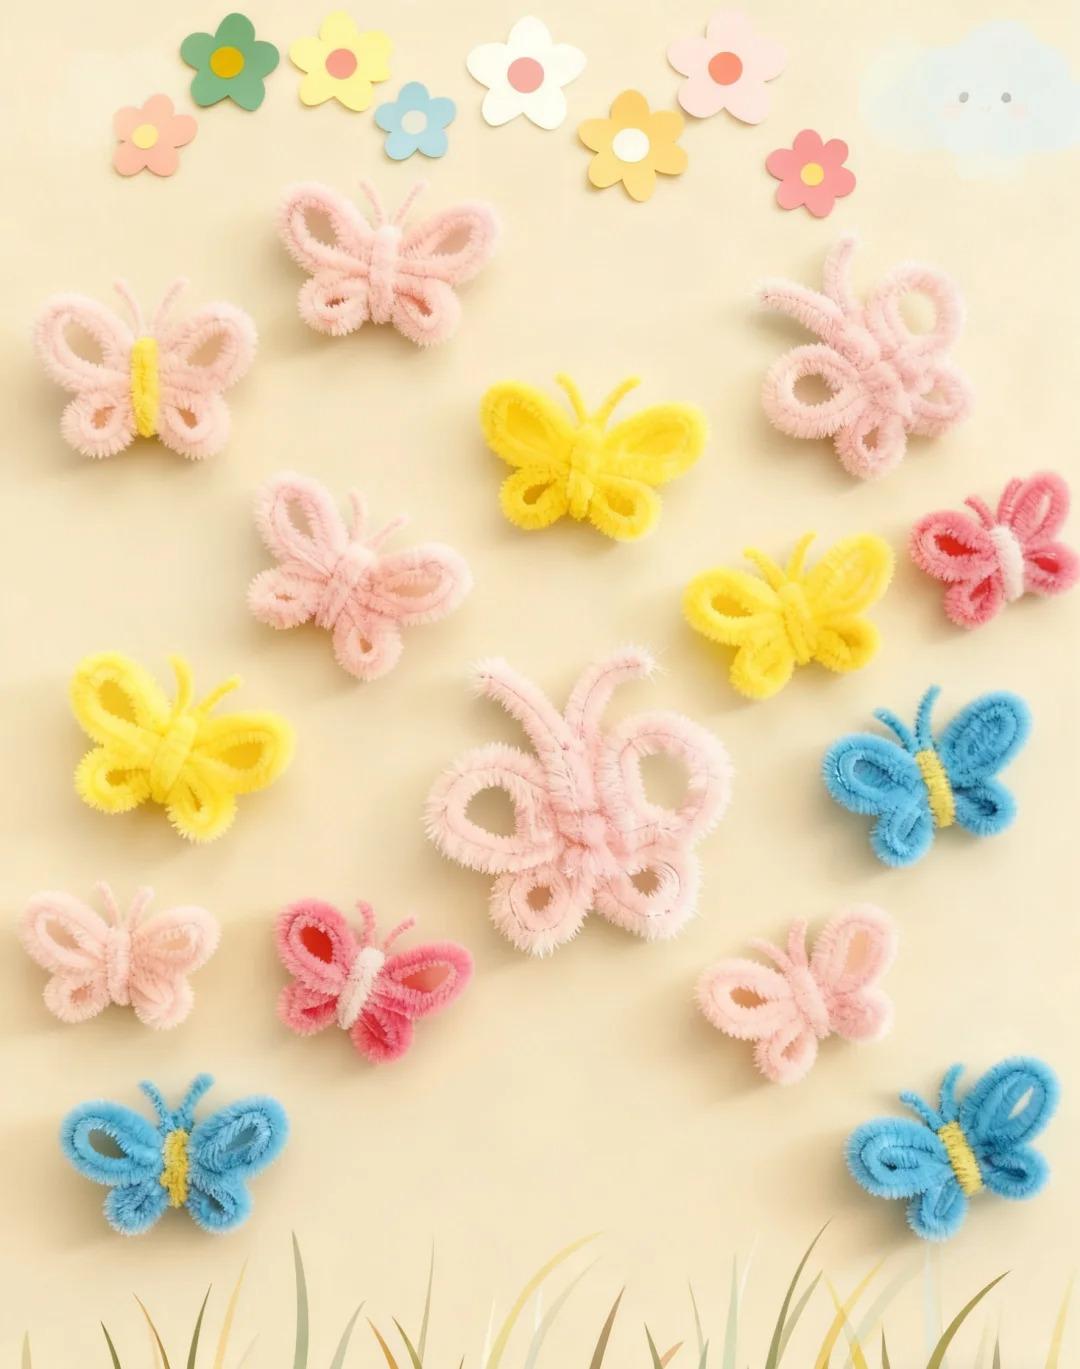
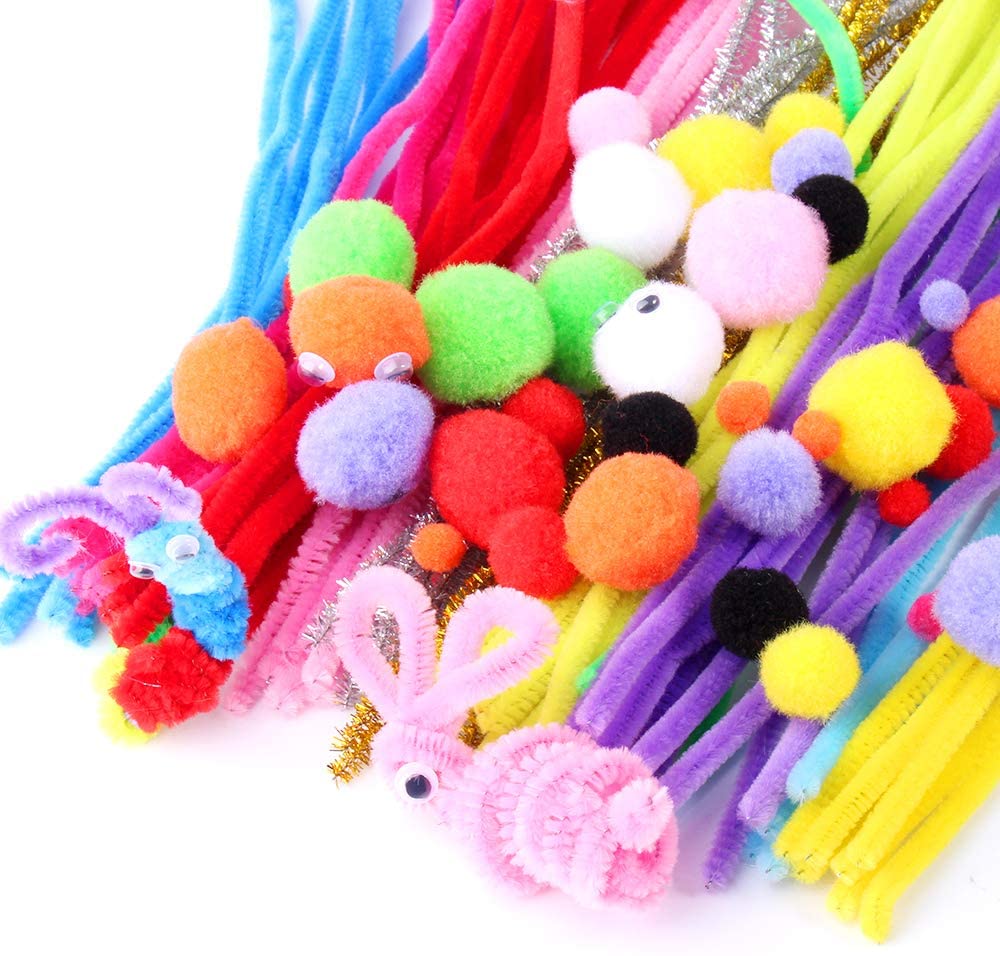
Hey craft pals—ready to make the fluffiest, cutest butterflies ever?
All you need is a chenille2 minutes.
Let’s dive in—these little guys are perfect for decorating notebooks, hair clips, or just brightening up your desk!
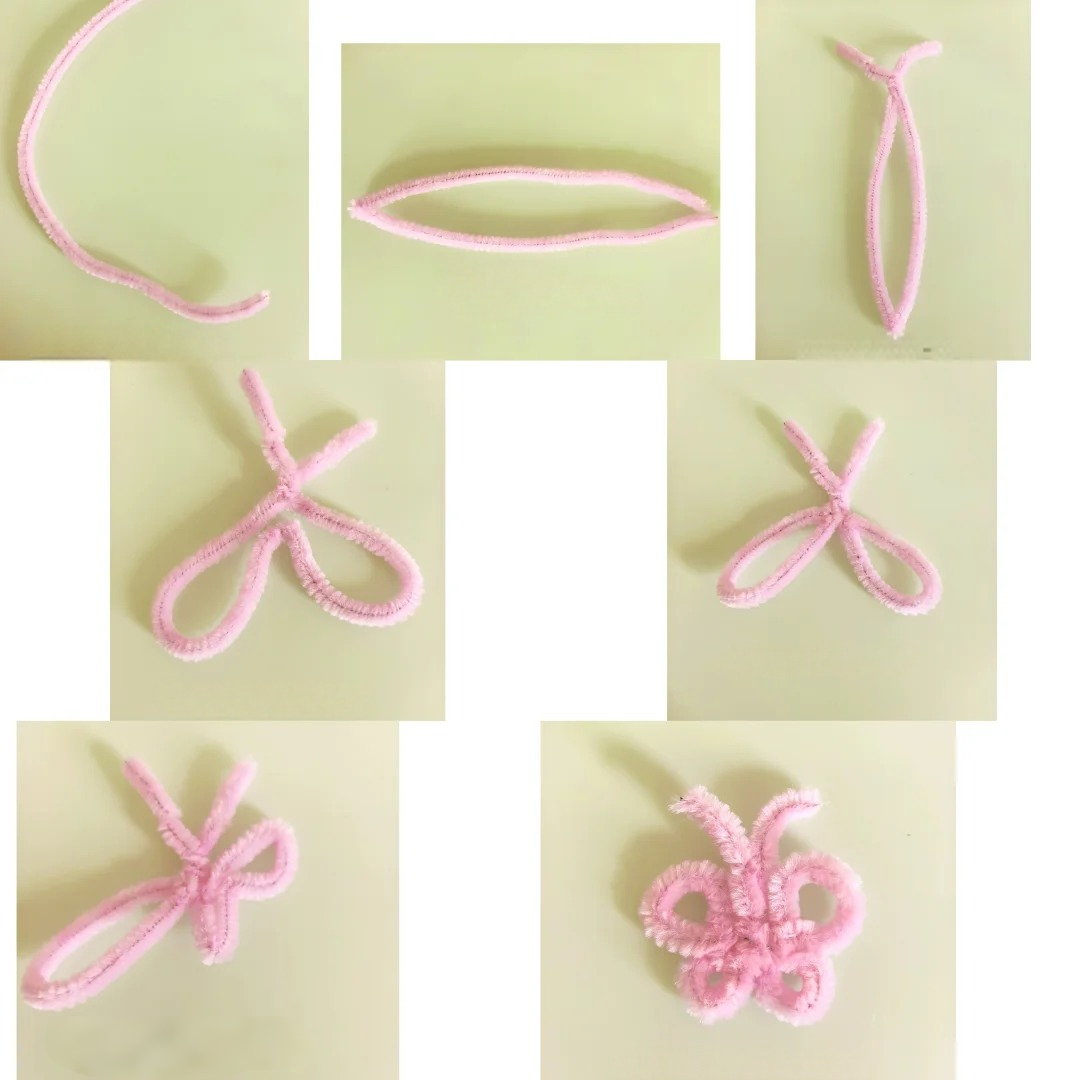
## Your Step-by-Step Fluffy Butterfly Guide
Grab your favorite chenille (we’re rocking pink here—so dreamy!) and follow along:
1. Start simple: Grab 1 single chenille (no fancy supplies needed!).
2. Fold it up: Fold the chenille neatly in half—this sets the base for your butterfly’s body.
3. Secure the shape: Give the open end of the folded chenille a tiny twist—this keeps everything from wiggling loose (it’s the butterfly’s body core!).
4. Shape the shoulders: Fold the top middle part of the chenille downward—this creates the “shoulder” area where the wings will sit.
5. Tame the tiny wings: Twist the two small folded sections (they’re your baby wings!) to lock their shape in place.
6. Make the big fluffy wings: Fold the right wing toward the center, then twist it—make the top part of the wing bigger and the bottom smaller (so cute!). Do the exact same thing for the left wing.
7. Final fluff-up: Adjust the tiny top bits (those are the antennae!) to make them perky, then smooth out the wings… and boom—your fluffy butterfly is ready to “flutter”!
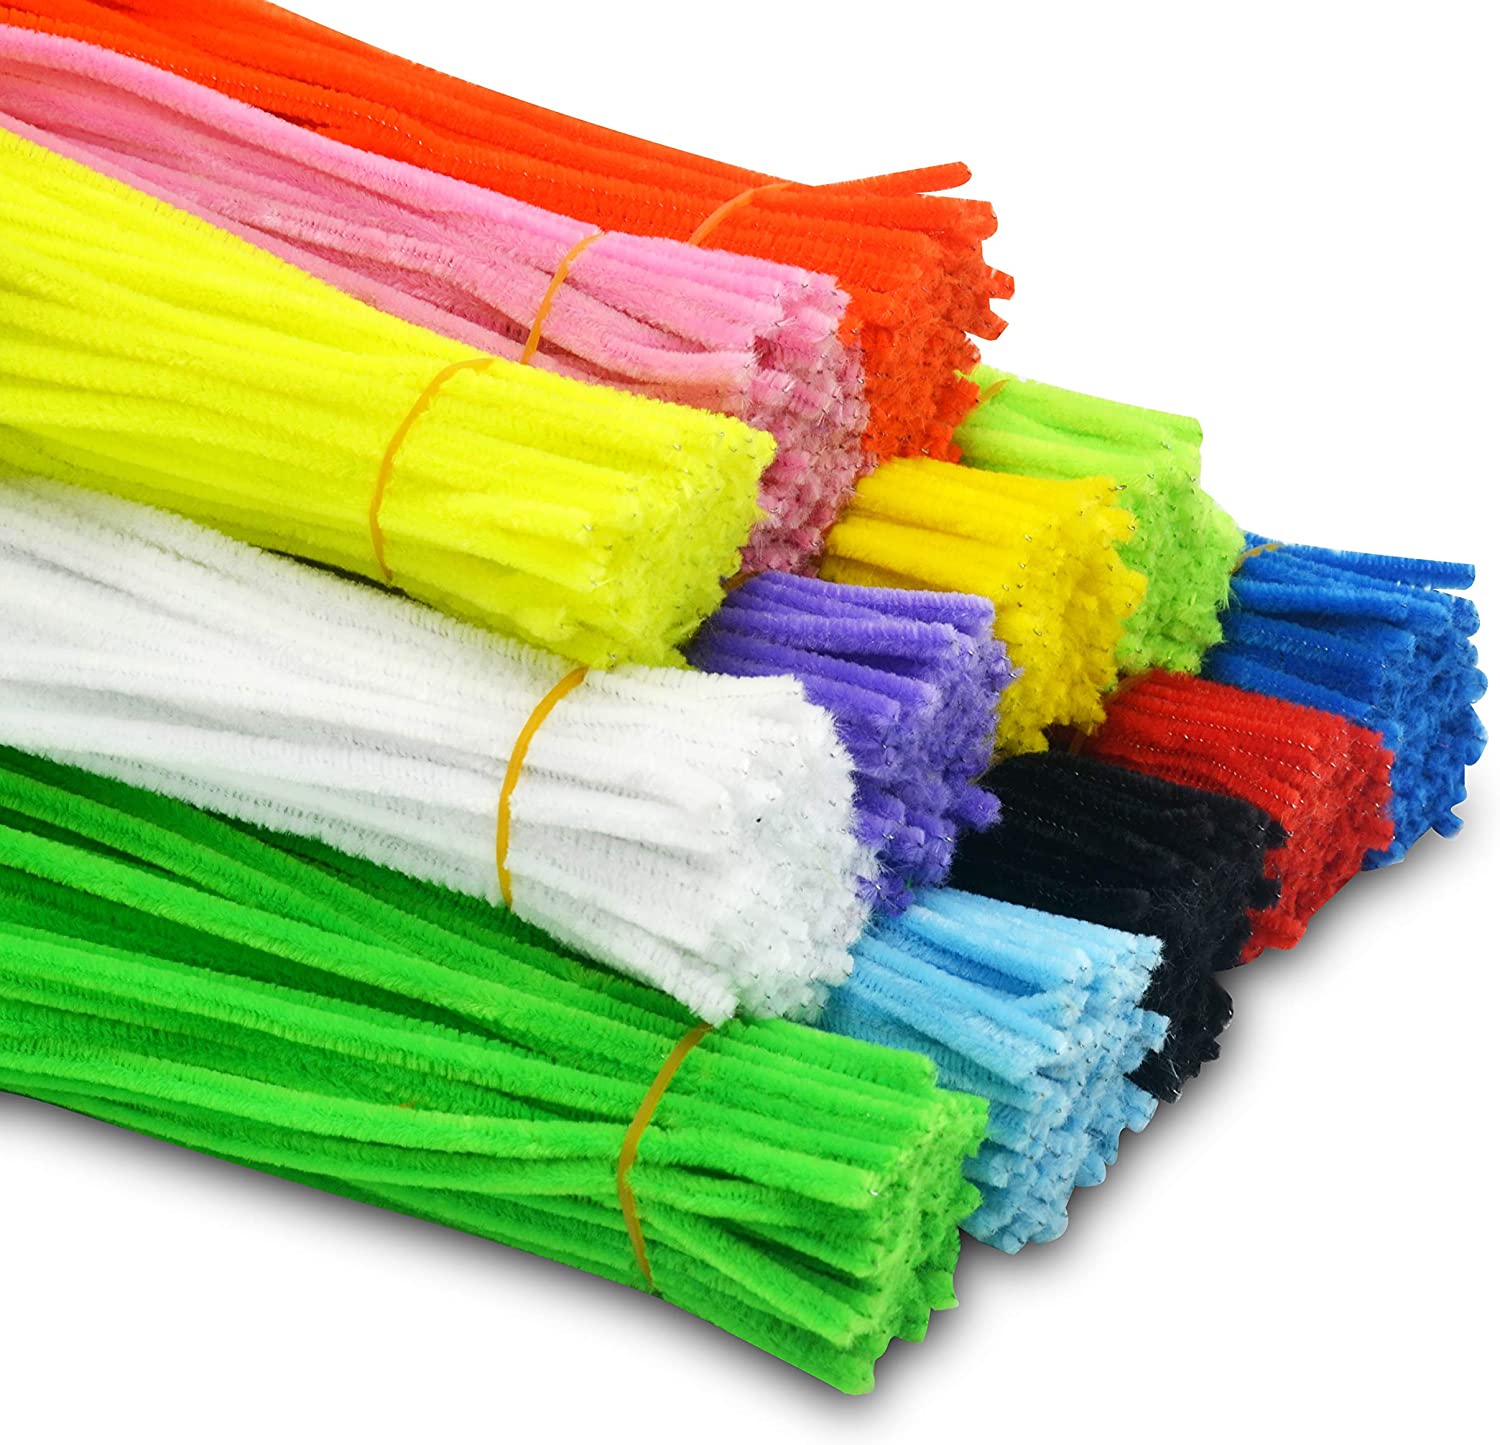
## Why Our chenilles Are Perfect For This (And Every!) Craft
These adorable butterflies? They’re made with our ultra-fluffy chenilles—and here’s why they’re a craft must-have:
- Squishy & Super Bendy: They’re soft to the touch (no scratchy edges!) and twist/shapes like a dream—no fighting stiff material here.
- Rainbow of Colors: We’ve got every shade (pastels, brights, even sparkly options!) to match any craft mood.
- Kid & Crafter-Friendly: Non-toxic, gentle on little hands, and durable enough for hours of twisting fun—perfect for both pro crafters and tiny artists.
Ready to make a whole flock of fluffy butterflies? Grab our chenilles today—your next cute craft is just a twist away!


.jpg)

.jpg)
.jpg)
.jpg)