Want to glam up your acrylic nails? Glitter is the way to go! Add instant sparkle by using glitter acrylic powder. These come in tons of great colors and they give a fine shimmer to your nails.
If you can't find a color you like, don't worry—mix your own acrylic powder with fine glitter.
You can also press large crystals onto your already finished acrylic nails to make them even more dazzling.
Method1
Using Glitter Acrylic
1
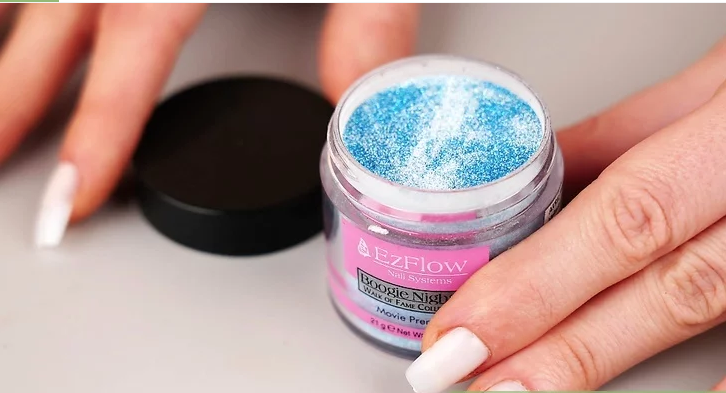
Buy glitter acrylic powder in the shade you want to make your nails. Have fun looking for sparkly glitter acrylic powder. These come in so many shades that you shouldn't have trouble finding the perfect shimmery hue.
The great thing about glitter acrylic powder is that you don't need to mix glitter with pigment—it's all ready to use!
1 small pot of acrylic powder should last you for a few months if you're doing acrylic nails as a hobby, so it really won't take much product to do a set of glitter nails.

2
Mix fine shimmer into acrylic powder to make a custom glitter powder. Can't find the glittery shade you're looking for? It's really easy to make your own unique glitter powder.
Just mix together 3 parts of fine glitter with 1 part of acrylic powder in a small dish.[1]
Play around with your glitter color! You can match the glitter color to the acrylic powder color for a deep or bright pop of color or use complementary colors like silver glitter with blue acrylic powder.
Buy nail glitter and acrylic powder at your local beauty supply store or online.
3
Dip a nail brush into monomer and tap it into your glitter acrylic powder. Pour a little monomer into a dappen dish and dip an acrylic nail brush into it.
Then, dab the brush right into the glitter acrylic powder so a bead forms on the bristles.
Monomer is the acrylic liquid that you combine with the acrylic powder to make your nails.

4
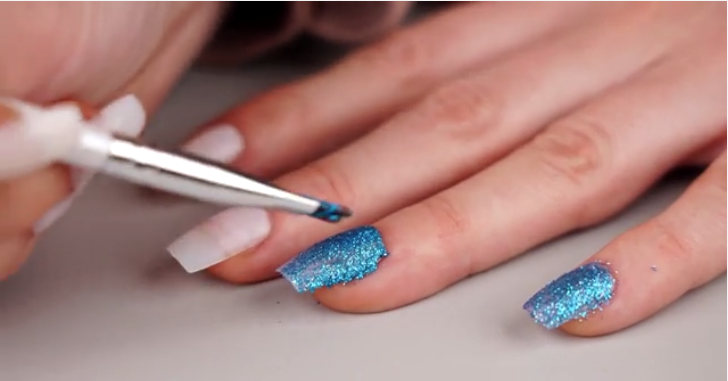
Press the acrylic bead onto your nail and use the brush to shape it. To make your glittery nail, push the glittery bead onto the center of your nail. Wipe your brush onto a clean paper towel to get rid of excess acrylic powder or glitter.
Then, press the bristles onto the top and sides of the acrylic bead to shape the nail.
For example, you could round the tip of the nail to make an almond or oval shape.
5
Clean your brush with acetone and monomer every few strokes. It's really easy for glitter to build up and clump in your brush bristles, so wipe it on your paper towel to remove most of the glitter.
If you still see glitter in the bristles, pour a little acetone into a small dish like a dappen dish and swirl your brush in it for a few seconds. Then, wipe the bristles on a paper towel and dip them into monomer to condition them.[4]
Some nail artists recommend against using acetone because it can dry out the brush.
However, it's great at removing glitter. As long as you don't leave the bristles in the acetone and you condition the brush with monomer, your brush should be fine!
6
Apply a clear acrylic coat to seal and encapsulate the glitter. To give your nails a professional, shiny appearance, take a clean nail brush and dip it in monomer.
Tap it into clear acrylic powder and press the bead onto your glittery nail near the cuticle. Then, work it evenly down the entire nail so it's coated and smooth.
It's totally fine to skip this step, but if your glitter has large or chunky pieces, they may fall off over time. The clear coat seals them in.
Method2
Adding Glitter or Crystals
1
Buff the surface of your acrylic nail with a fine or medium grit file. Want to add shimmer glitter or a few large crystals to the acrylic nails you already have?
Start by filing the surface of your acrylic nail with a 180 or 240 grit file so your gel and glitter will be able to stick. Then, wipe off any dust with a clean cloth.[6]
You can add glitter to all of your nails or choose just 1 to be a shimmery accent nail.
2
Brush clear builder gel wherever you want to put the glitter or crystals. Think of the builder gel as glue, so apply it anywhere on the nail where you'd like the shimmer to stick. Gel can be a little gloopy to work with,
but don't feel like you have to rush—it won't dry quickly on its own.[7]
3
Sprinkle fine glitter or shimmer powder over the gel. Set a dish on your workspace to catch excess glitter or shimmer and hold your finger over it. Slowly shake your glitter or shimmer onto the nail so it lands on the gel you just spread.[8]
Buy high-quality nail glitter, shimmer, and crystals at beauty supply stores or online.
Want a faint layer of glitter? Sprinkle just a little glitter onto the nail or keep shaking to completely coat the surface if you want a bright, sparkly nail.
If you leave the glitter uncoated, this makes a "sugared" effect. If you cover the glittered nail with a top coat, this encapsulates or burnishes the nail so it shines.

4
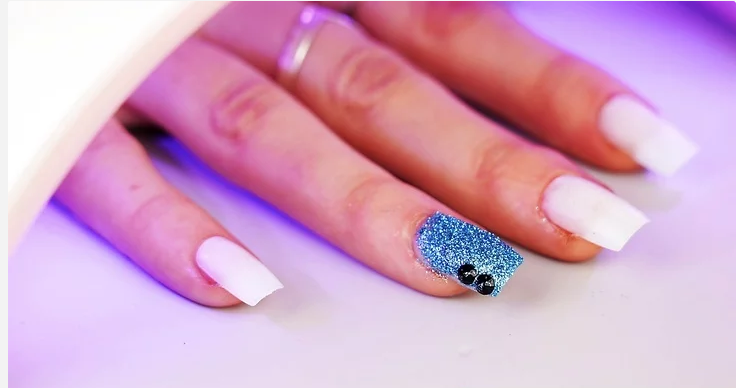
Press large pieces of glitter or crystals onto the nail. Take the brush that you used to apply the gel and tap it into your glitter mix or loose crystals so they stick.
Then, push them into the gel on your nail so they release. Keep applying the glitter or crystals until your nail is as coated as you like.
Since the brush can get clogged with larger glitter, wipe down the bristles frequently.
5
Hold your nail under a UV light for 60 seconds to cure the gel. The builder gel won't dry on its own, so stick your hand under a UV light for a minute so the gel hardens.
This is really important since you don't want the glitter to move around before your nails are done![9]
6
Spray isopropyl alcohol onto a cotton pad and pat it over the nail. Although your nail is set, the builder gel does leave behind a slightly sticky residue.
Spritz a clean cotton pad with isopropyl alcohol and dab the surface of the glittery nail with it. Keep dabbing until it doesn't feel sticky when you touch it.[10]
This is a great method for miniature crystals or glitter that has texture.


