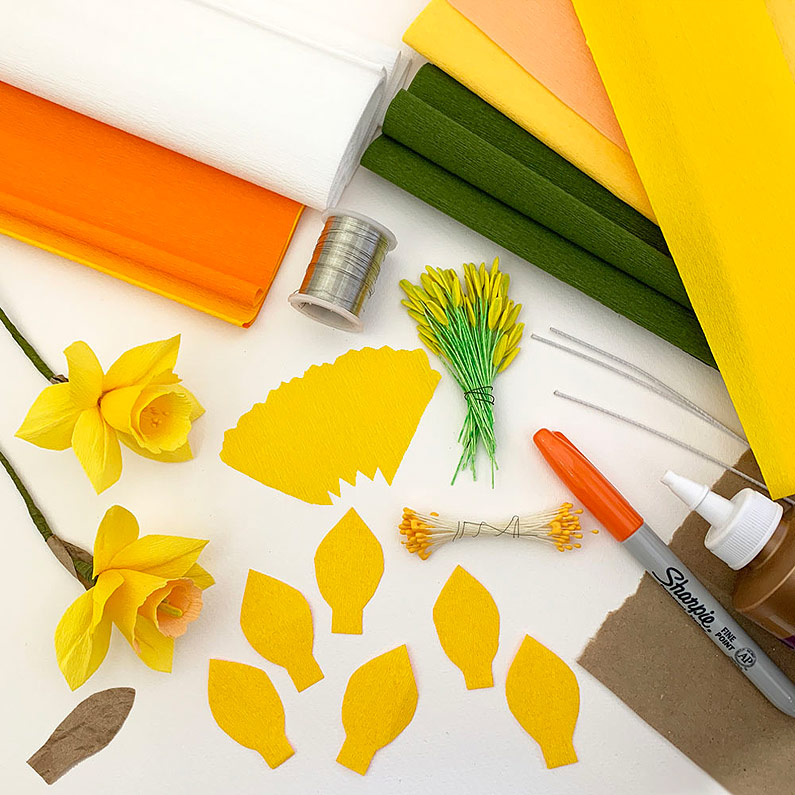
Supplies: Crepe Paper (Greens + Colors), Kraft Lunch Bag, Stamen, Template, Wire (26 or 28 Gauge), Floral Wire, Glue (Alleen's Tacky Glue or Hot Glue), Scissors, Paint Brush or Pencil, Colored Pens (optional), Binder Clips (optional, for holding template to crepe while cutting), Wire Cutters (or scissors used for cutting wire)
Template: Click here to download a free pdf of our Crepe Paper Daffodil Template.
Step 1: Cut pieces: Using templates, cut petals, trumpet and stem wrap out of crepe paper. Make sure grain of crepe paper is running up/down on each piece to allow for shaping. You can cut multiple petals at once by folding crepe in an accordion shape -- we find 3 layers of crepe ideal for ease of cutting.
Repeatedly crinkle and smooth a piece of Kraft lunch bag to give it a crinkled texture. Using template, cut 1 spathe piece.
To make one (1) daffodil: cut 6 Petals, 1 Trumpet and 1 Stem Strip + 1 Spathe.
Step 2: Shape petals and trumpet: "Cup" petals by gently stretching crepe outward and around thumbs at midpoint. Form a pleat down the center of the petals and press flat while maintaining a slight curve. Shape trumpet by bending edge around a paint brush handle then stretch edge of crepe to create a lightly ruffled effect. Wrap trumpet around a pen (or other squared off item) just above jagged edge; pinch tightly and twist lightly to shape crepe.
Step 3: Create stem and stamen. Add trumpet. Using a 3-4" piece of wire, secure stamen to end of floral wire by wrapping several times. Position trumpet so stamen are visible but not sticking out beyond edge. Using a 3-4" piece of wire, secure trumpet to stem by wrapping tightly at base. Take care not to flatten the trumpet's shape.
Step 4: Add petals: Bend small lower section of petal approximately 90 degrees. Add 2-3 drops of glue to bent section and apply petal to base of trumpet. Bent section should cover wire but leave shaped trumpet free and visible. Press gently to secure. Continue applying petals.
Daffodils have 6 petals so it's easiest to apply 3 petals spaced evenly around the trumpet then add the remaining petals in between the first set. Let dry.
Step 5: Wrap stem: Pull strip of crepe slightly to stretch crepe. Add glue to 1/2" area at end of strip. Place around base of flower wrapping gently but securely. Wrap 3-4 times around, then begin angling downward to cover the stem. Continue wrapping crepe strip downward. Wrap to 1/4" above end of stem. Trim crepe to 1" and add glue. Wrap securely around stem and pinch to secure. Let dry.
Step 6: Add spathe: About 1-1/4" below base of flower (about 3/4" for the smaller style), bend stem at a 45 degree angle. Add glue to base of spathe and apply to stem below bend. Wrap edges around stem so spathe has a cupped shape. Let dry.
Cut a small piece of stem-colored crepe about 1/2" wide x 3" long. Apply glue and wrap piece securely around stem, covering glued area of spathe and then wrapping downward. Let dry.
Step 7: As needed: adjust petals, re-shape trumpet, crinkle spathe. Make more and display proudly!
Tips: The steps shown above illustrate the largest blossom on the template (A) and was made on a 6" length of floral wire. You are of course welcome to build on any length of floral wire that suits your taste. Longer lengths work well for display in larger vases; smaller lengths work well for bud vases or using the flower as an embellishment on packages or gifts.
In nature, many daffodils have color gradients or subtle fades to their trumpets and sometimes petals. Use colored pens to add accents to the edges of your trumpets. We used a yellow Sharpie to add color to the inside edge of our daffodil, above left, so the peach center would have a hint of the outside color and the outside edge would have a subtle accent.
Experiment on scraps of crepe with different pens before trying it on your completed flowers so you'll have an idea of the end result. Look to nature for color combo inspiration.
We used 2 yellow lily stamen for our larger blooms and 3-4 double ended stamen folded in half (6-8 heads) for our smaller styles.
Shape petals to give your blooms different character: more upward petals closer to the trumpet are like a daffodil that has just bloomed while downward or outward petals are like a flower in full bloom.
We wrapped our larger trumpet around the base of an Ultra Fine Point Sharpie which is about 3/8" across. For the smaller trumpet, we used the handle end of a craft paintbrush that measured between just over 1/8" across.
